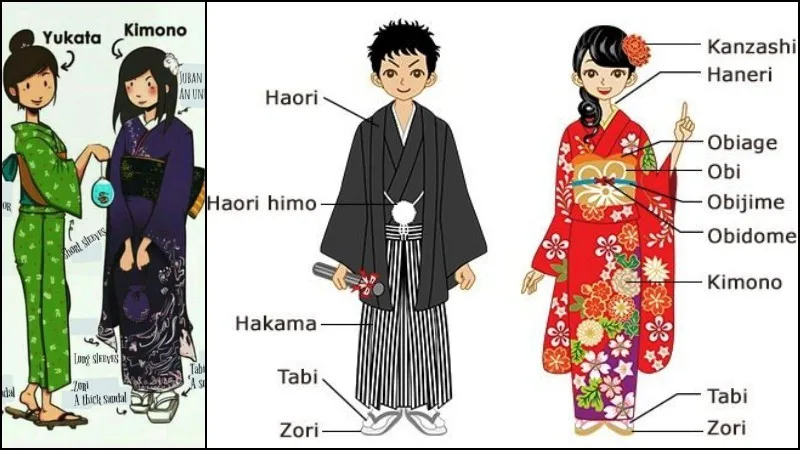
You have certainly seen the yukata (浴衣) in anime or in something related to Japanese culture. This garment is generally worn in the summer because it is more comfortable and made of lighter fabric. The yukata can be worn by both men and women, with only a few changes in style.
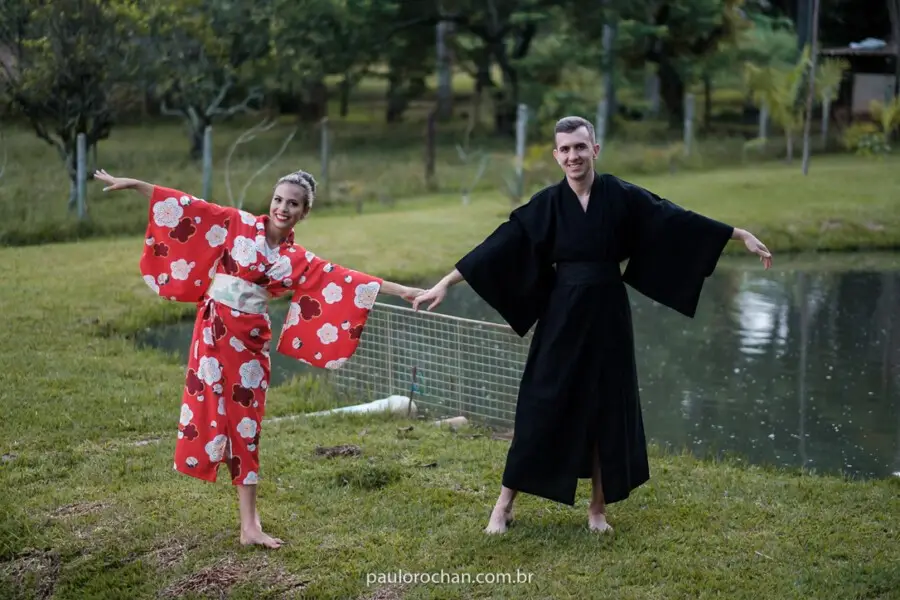
The yukata is a casual style of kimono, worn by men, women, and children. The fabric of the yukata is cotton or synthetic fabric. It is like an elegant robe, held to the body with a sash called obi (fabric belt). But how did this style come about? What is the difference between kimono and yukata? Let's see more details about this clothing.
Contents 4
How and when did the yukata originate?
The yukata is a more traditional outfit; however, on certain occasions and festivities, it is common to wear this clothing. The outfit originated from yukatabira (湯帷子), a garment made of hemp (a plant of the Cannabis sativa species) commonly worn by people of nobility to bathe in hot springs (onsen).
This practice already existed during the Heian period (794 - 1185), but it became popular in the Edo period (1603 - 1868) with the increased use of cotton in Japan. It is believed that cotton in the fabric was introduced around 799 when it was brought to Japan by shipwrecked Chinese. The cultivation of cotton only increased, making Japan the largest producer of traditionally made kimonos.
Yukata literally means "bathrobe," and initially, that was its purpose. The yukata was used for a time only as loungewear to wear after bathing or sleeping. However, the garment eventually became popular for festivals as well. The traditional yukata had its fabric dyed with indigo leaves (a plant that produces the color indigo), similar to denim, varying between blue and a bit of white.
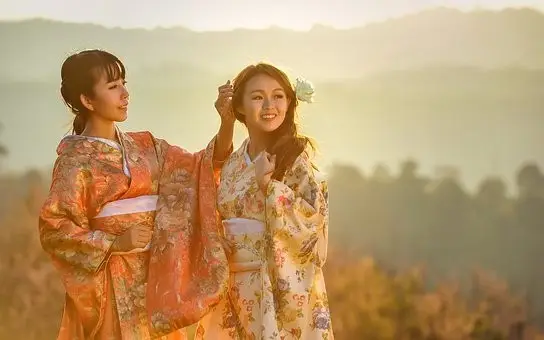
But currently, there is a wide variety of models to wear, and it is possible to make different combinations using accessories and much more. There isn't much of a standard to be followed nowadays with this garment. Men's yukatas tend to have darker colors, while women's are more colorful and usually have floral patterns.
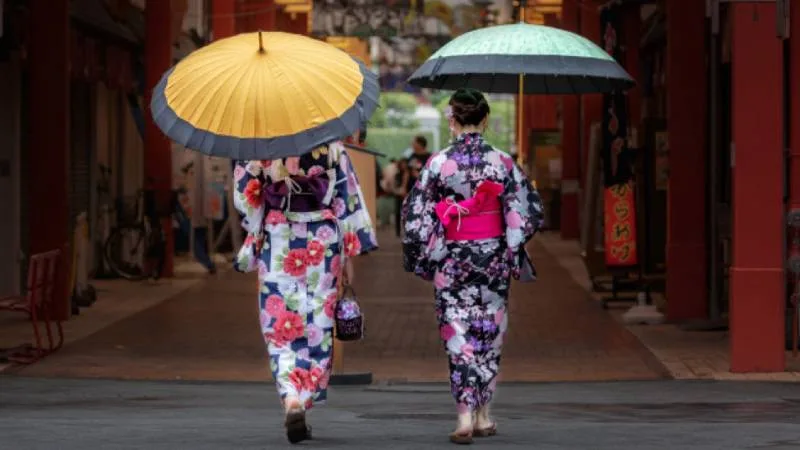
It is still common for people to wear yukata at Japanese festivals and at fireworks festivals (Hanabi Taikai). Also at other traditional events that take place during the summer. In places with hot springs, they walk freely in yukata. Also, in traditional ryokan hotels and onsens.
What is the difference between yukata and kimono?
Kimono literally means "clothing" and is generally worn on more formal occasions such as weddings, funerals, and others. In the past, it was common for men to wear it daily. However, now it is more focused on certain formal events.
Kimonos, both male and female, are generally in more discreet patterns. To wear a kimono, it is necessary to follow some etiquette rules regarding the occasion, season of the year, gender, degree of kinship, or marital status of the person wearing it.
The tailoring of male and female kimonos has a slight alteration regarding the sleeves. Men's kimonos are sewn under the arm, while women's have the forearm open. The fabrics can be cotton, silk, and various options of synthetic fibers.
The difference with the yukata starts with the nomenclature; yukata originated from the words yu (bath) and katabira (underclothing). In addition to everything that has already been mentioned about the garment, the traditional yukata is usually made of standard cotton fabric and is worn for summer festivals and even as pajamas. The ways of wearing them are also different, and the yukata is much lighter.
How to wear yukata?
The Japan House São Paulo website (www.japanhousesp.com.br) provided a step-by-step guide on how to wear yukata.
You will need:
• Yukata: informal summer kimono.
• Obi (帯): ornamental sash used to tie the kimono.
• 2 himos (紐): sashes measuring generally 240 x 4.5 cm (can be adapted using sashes of other widths or thick elastic, as long as they are comfortable and do not slip)
• Shitagi (下着): undergarment used to protect the kimono from body sweat. This item is optional and can be adapted with a cotton t-shirt with a low back neckline to show skin through the opening of the eri (衿), the collar.
• Geta (下駄): Japanese wooden sandals. This item is also optional and can be adapted with flip-flops.
1. Align the senui (背縫い), the vertical seam in the center of the back, with the center of the body.
2. Bring the ends of the eri together to ensure that the seam is in the center of the body and adjust the height of the hem.
3. Check the height of the hem on the left side of the yukata, as this part will be on top at the end.
4. Position the right side so that it is not visible after overlapping the left side. Overlap the left side. The ideal length should hide the ankles or allow them to appear subtly when moving.
5. Tie the koshihimo (腰紐), the hip tie. Wrap it around the body twice and tighten enough to secure the position of the fabric comfortably.
6. Place your hand through the miyatsukuchi (身八つ口), the opening below the sleeve that exists only in women's kimonos, and adjust the ohashori (おはしょり), the fold of excess fabric also present only in women's kimonos. Organize the fabric at the back and front.
7. Adjust the eri at the front near the bones below the neck in a "Y" shape and leave an opening at the back of approximately one fist width.
8. Make the munahimo (胸紐), the chest tie. Wrap it around twice, take a deep breath, and tighten to secure the position of the fabric. This way, you ensure that you can breathe comfortably while wearing the kimono.
9. Smooth the fabric at the back and front of the munahimo and ohashori, both at the front and back, as they will be visible after tying the obi.
10. If possible, align the seams at the front, sides, and back of the kimono. This part requires practice, but don't be discouraged if you can't do it. Wear it the way you can and perfect it over time!
How to tie the obi
1. Fold the sash in half and leave a tail to secure the tie, passing slightly above shoulder height diagonally.
2. Open the sash forming an arrow, aligning the top part of the sash to a height close to the middle of the bust or just below it, depending on the body. Wrap it around twice, tightening the sash and inhaling in the same way as was done with the munahimo.
3. Fold the obi diagonally to facilitate the knot.
4. Make the bow at the front of the body. Use the shoulder measurement to start folding the tare (たれ), the longer part that remains after the knot, and fold as many times as possible, aligning the edges.
5. Position approximately the center of the tare above the knot. Fold it in half crosswise and then fold again in half with the two halves, the top and bottom, forming an accordion.
6. Pass the folded tail of the sash left at the beginning of the process under the previously made knot. Wrap it around once more to secure, roll up the remaining part, hiding it inside the obi, and center the sides of the bow.
7. Carefully rotate the obi from left to right to avoid messing up the eri and position the bow in the center of the back.
8. Put on the geta - the Japanese wooden sandals - and other accessories.


Community
Comments
0 comments
There are no published comments in this language yet.
Send comment